One of the best books I purchased on my first trip to Seoul was “An Illustrated Guide to Korean Culture” prepared by the National Academy of the Korean Language. It contains chapters on 233 traditional key words. The first entry in the large food section is Bap 밥, steamed rice. This demonstrates how important rice is to Korean culture. By the way, raw rice is called ssal 쌀 and a rice plant is called byeo 벼. In Korean conversation to “eat bap” is synonymous to “having a meal”. I think this is the logical place to start writing about Korean cooking.
What kind of rice
Basic Korean rice is a medium grain rice that becomes sticky when cooked. In the US, Calrose medium grain rice is a very close substitute for imported Korean rice. It is sold at Costco as the Homai brand and by Rhee Brothers as both the Han Guk Mi and Rhee Chun Rice brands. Homai is what I use at home for everyday meals.
What to use to cook the rice
Rice can be cooked in a pot on the stove or using a rice cooker. Rice cookers can be simple and cheap or sophisticated pressure rice cookers that can cost hundreds of dollars. I have two cookers. One is a $30 Aroma model from Costco.

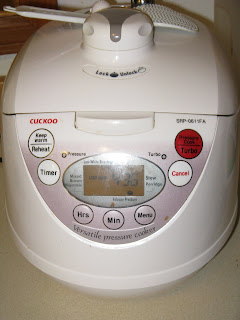
The other is a pressure rice cooker that I received as a gift.
Rice cookers can be very convenient. If you follow the basic instructions for the cooker or on the rice bag, you should be able to produce a good batch of rice without a lot of fuss. On the other hand, it is a useful skill to be able to cook rice well without a special appliance. I’ve been using a regular American style 3 quart pot with a glass lid and a Korean cast aluminum pot gamasot 가마솥 with a black non-stick coating.

Each night for the past week I’ve been making a fresh pot of rice on the stove by cycling through the three different cookbooks mentioned in my previous post. I have made decent rice from each recipe. This is what I did tonight and it produced a very good batch.
My steps to cooking rice on the stove
1) Measure rice into the pot. Two cups will serve two or three people.
2) Run cold water over the rice while swishing it around with your fingers.
3) Tip the pot as needed to drain the water. Be careful not to dump the rice into the sink. Repeat until water is nearly clear.
4) Cover rice with cool water and let soak from 30 to 60 minutes.
5) Drain and cover the rice with the same amount of water as rice. Note: this does not mean the water should be at the same level as the rice in the pot. Two cups of water over two cups of rice will cover the back of your fingers if you gently place your hand flat, palm down, on top of the rice.
6) Cover the rice and bring to a boil on high heat. Stir and cover again.
7) Reduce heat to medium low for 10 minutes and then stir.
8) Reduce heat to low and then cook an additional 10 minutes.
9) Reduce heat to lowest setting and let sit until ready to serve.
This works on my stove but your results may differ. If you have hard rice at the end you should add a little water to the pot and turn up the heat and replace the cover. If the rice is too watery, you should take the lid off and turn up the heat. Stir the rice a bit to help the water evaporate. Try not to disturb the rice at the bottom as by now it has become a little hard. Your rice will improve if you practice and make adjustments to the cooking process.


